東芝のdynabook N514/25Kを分解してみた!!<Part2> (I tried decomposing Toshiba's dynabook N514/25K !! <Part2>)
また無駄使いが加速しています。
(Also wasteful use is accelerating.)

暇だったから、ついつい・・・
(Because I was bored, I was carelessly ...)
<Part1>の続きです。
(It is the continuation of <Part1>.)
中古で購入したdynabook N514/25k。
(dynabook N514/25k purchased second hand.)
ヒンジ部分に隙間がありました。
(There was a gap in the hinge part.)
HDDをSSDに交換するつもりなので、さっそく分解です。
(I will exchange HDD for SSD, so it is disassembled at once.)
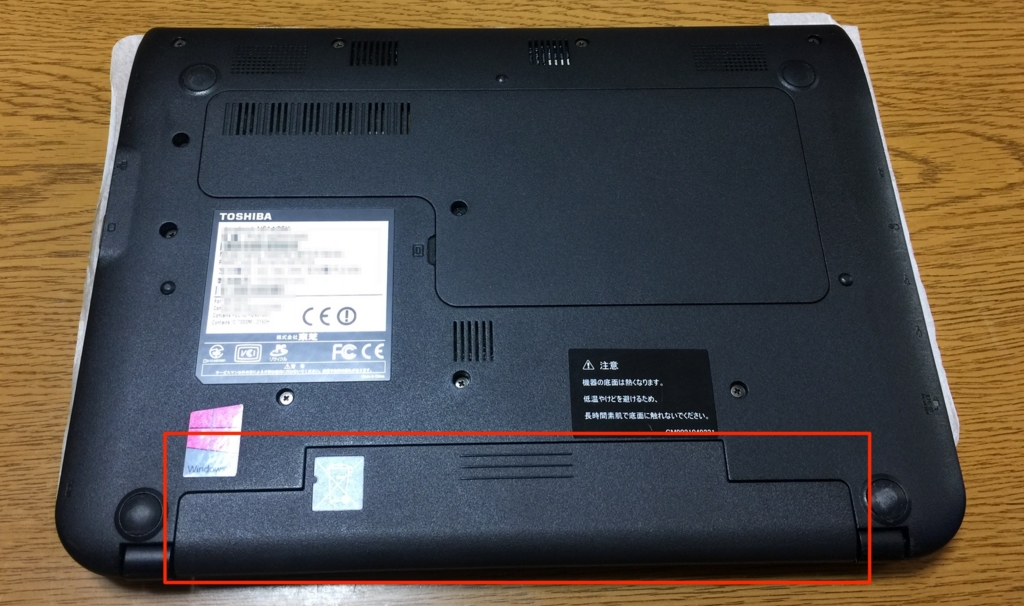
まず、バッテリーを外します。
(First, remove the battery.)

ここのネジを外すと、バッテリーは取り外せます。
(Remove the screw here, you can remove the battery.)

あとは見えるネジを全て外します。
(Remove all visible screws.)
HDDも外します。
(I also remove the HDD.)

ここに隠しネジがあります。
(Here is a hidden screw.)

ゴム足は両面テープで貼り付けてあるだけなので、先の尖ったもので外せます。
(Since rubber feet are pasted with double-sided tape, it can be removed with a pointed object.)

これで全てのネジを外しました。
(I removed all the screws with this.)
あとは裏面のカバーを外すだけです。
(Then just remove the cover on the back.)
これがカバーを外した状態です。
(This is the state that the cover is removed.)

この部分のネジが壊れていました。
(The screw of this part was broken.)

ネジが閉まらない・・・
(The screw does not close ...)
これは修復不能ですね。
(This is irreparable.)
残念。
(Sorry.)
液晶パネルの開閉には支障がないので、この部分の修理は諦めます。
(Since there is no hindrance to opening and closing the liquid crystal panel, I will give up repair of this part.)
では、HDDからSSDに交換します。
(Then, exchange from HDD to SSD.)
リカバリーエリアがなかったので、Windows10をクリーンインストールします。
(Since there was no recovery area, clean install Windows 10.)
今回購入したSSDはこちら。
(The SSD purchased this time is here.)

このSSDをセットして、インストール用のメディアからクリーンインストールします。
(Set this SSD and install it cleanly from the installation media.)
インストール後はWindows updateで不足しているドライバーをインストールします。
(After installation, install the missing drivers with Windows update.)
これで普通のWindows10パソコンになりました。
(With this, it became an ordinary Windows 10 personal computer.)
中古のパソコンでも、HDDをSSDに交換すると、まだまだ使えます。
(Even with secondhand PCs, you can still use it by replacing HDD with SSD.)
よろしかったらお試しください。
(Please try it if you like.)
にほんブログ村
☆☆☆-------------------------☆☆☆
ブログを読んで頂き、ありがとうございます。
(Thank you very much for reading a blog.)
毎日更新していますので、
よろしければコメント、ブックマーク、ツイート、読者登録をお願いします。
(Since it is updated on a daily basis,If it is good comment, bookmark, tweet, please subscribe.)
☆☆☆-------------------------☆☆☆