生活の役に立つ!! オススメの情報を毎日配信<2018年12月18日版>
生活の役に立つ!! オススメの情報を毎日配信<2018年12月18日版>
Windowsで詳細な電源設定を表示する方法(The way which indicates in-depth power supply setting by Windows)

以前のブログで、Windowsを高パフォーマンスモードに設定する方法を書きました。
(The way to set Windows as a high performing mode was written by the previous blog.)
でも、最近のWindowsは、それだけでは駄目です。
(But recent Windows is useless only with that.)
それは、「詳細な電源設定」の項目が省略されているためです。
(That's because the item of "in-depth power supply setting" is omitted.)
省略された状態がこれです。
(The omitted state is this.)
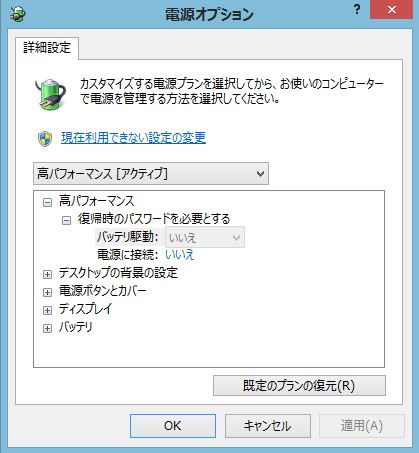
表示される項目が少ないですね。
(There are few indicated items, aren't there?)
実は、パソコンメーカーによって、本来表示される項目を制限されています。
(Well, you restrict the item indicated by a PC manufacturer originally.)
これはパソコンのチューニングとも言えるので、このまま使うことが推奨されているのだとは思いますが、やっぱり自分で購入したパソコンです。
(It can also be said tuning of a PC, so I think it's recommended to use it just as it is, but this is the PC bought by oneself as expected.)
自分の使いやすいように、調整したいですよね?
(The tending to use it, would you like to adjust it?)
そこで、今回は「詳細な電源設定」を表示させて、カスタマイズする方法をご紹介します。
(So I'll make "in-depth power supply setting" indicate this time, and I introduce the way to customize.)
尚、レジストリーを編集しますので、自己責任でお願いします。
(Further a registry is edited, so self-responsibility, please.)
まずは自分のパソコンで、「詳細な電源設定」を確認してみましょう。
(I'll confirm "in-depth power supply setting" by my PC first.)
① コントロールパネル→システムとセキュリティ→電源オプションと進みます。
(① I advance with a Control Panel -> system and a security -> power supply option.)
② 「コンピューターがスリープ状態になる時間を変更」を選択します。
(② "Of time when a computer will be in the sleep state, change" is chosen.)
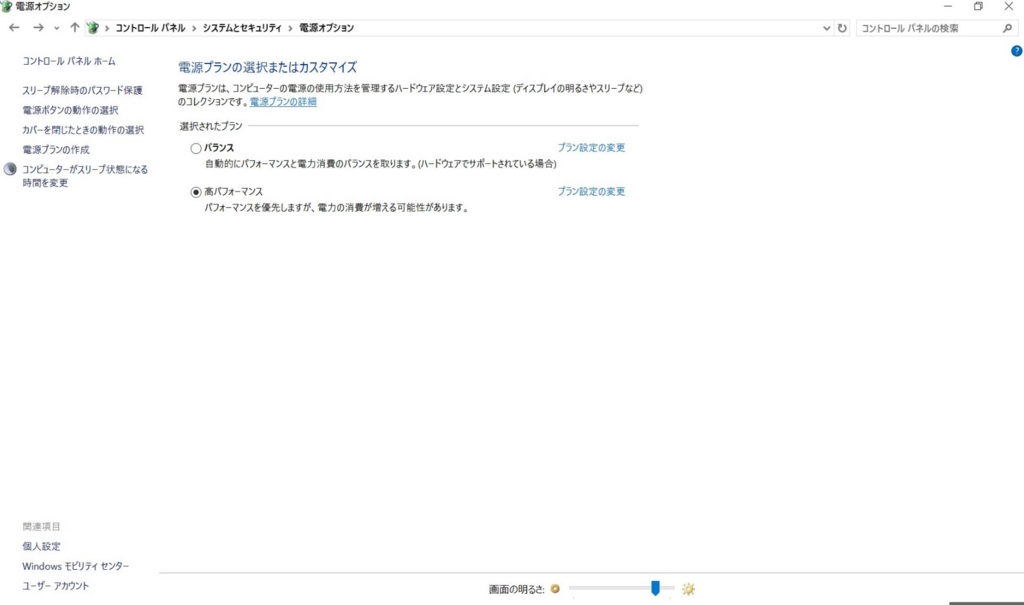
③ 「詳細な電源設定の変更」をクリックします。
(③ "Change in the in-depth power supply setting" is clicked.)
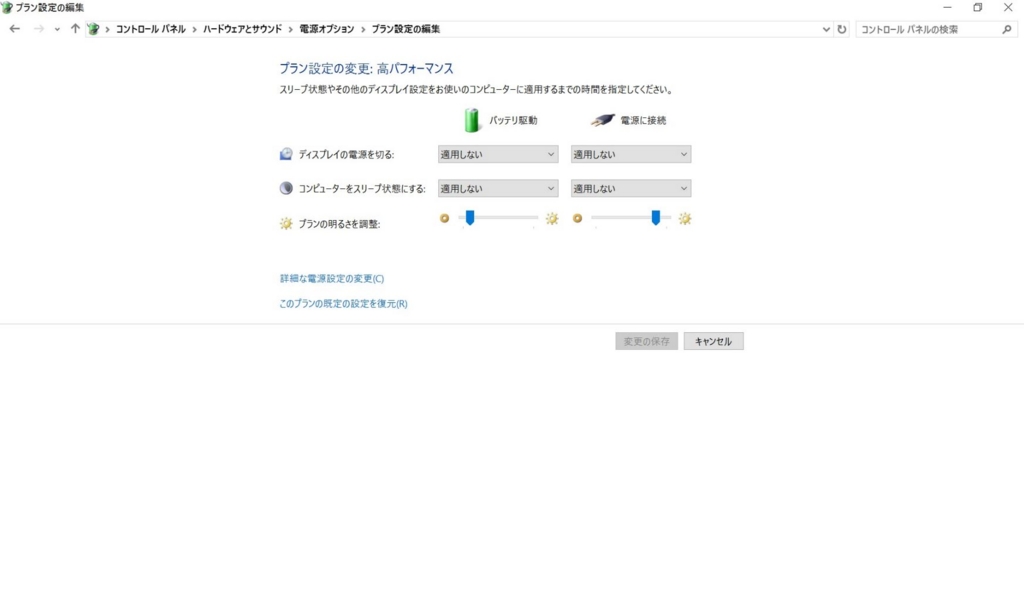
④ ここで表示される項目が下記写真のようであれば、「詳細な電源設定」は一部省略されています。
(④ When maybe the item indicated here is following picture, a copy of "in-depth power supply setting" is omitted.)
尚、表示される項目は、パソコンによって違います。
(Further the indicated item depends on a PC.)

では、ここからレジストリーの編集を行い、「詳細な電源設定」の非表示項目を表示させます。
(Then, I edit a registry from here and make the hidden item of "in-depth power supply setting" indicate.)
⑤ 「ファイル名を指定して実行」
(⑤ "The file name is designated and carried out.")
*Windowsキー+Rキーで表示されます。
(*It's indicated by a Windows key + R key.)
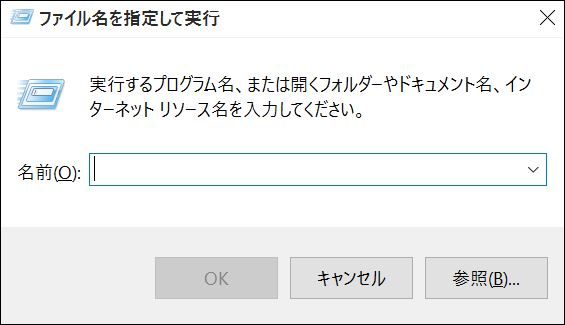
⑥ 「regedit」と入力して、OKをクリック。
(⑥ It's input with "regedit", and OK is clicked.)

⑦ 「HKEY_LOCAL_MACHINE\SYSTEM\
CurrentControlSet\Control\Power\
PowerSettings\54533251-82be-4824-96c1-47b60b740d00」の中に、以下の項目があります。
(⑦ The following item is in "HKEY_LOCAL_MACHINE\SYSTEM\CurrentControlSet\
Control\Power\PowerSettings\
54533251-82be-4824-96c1-47b60b740d00".)
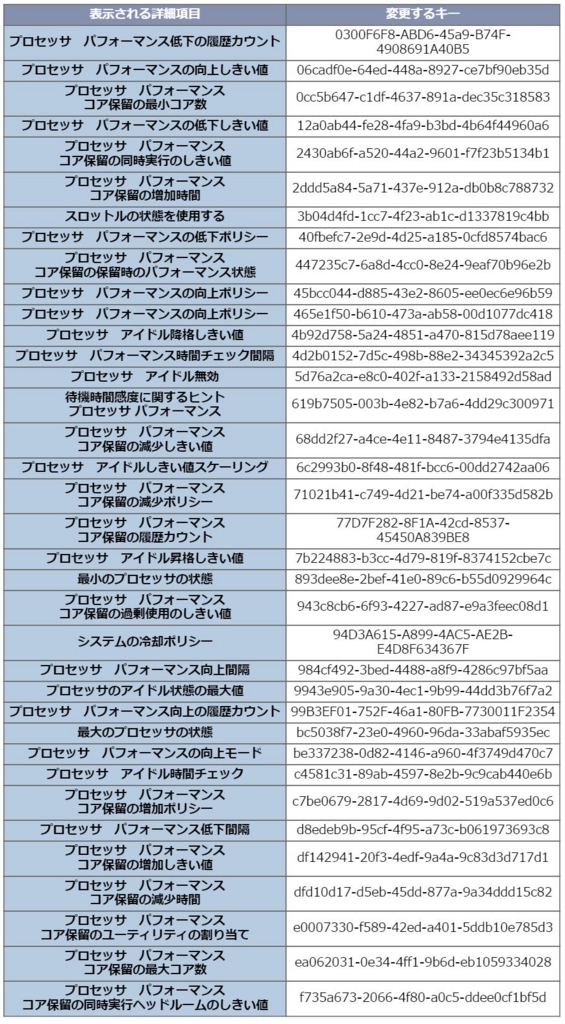
⑧ 今回は「最大のプロセッサの状態」を表示させます。
(⑧ I make "the state of the biggest processor" indicate this time.)
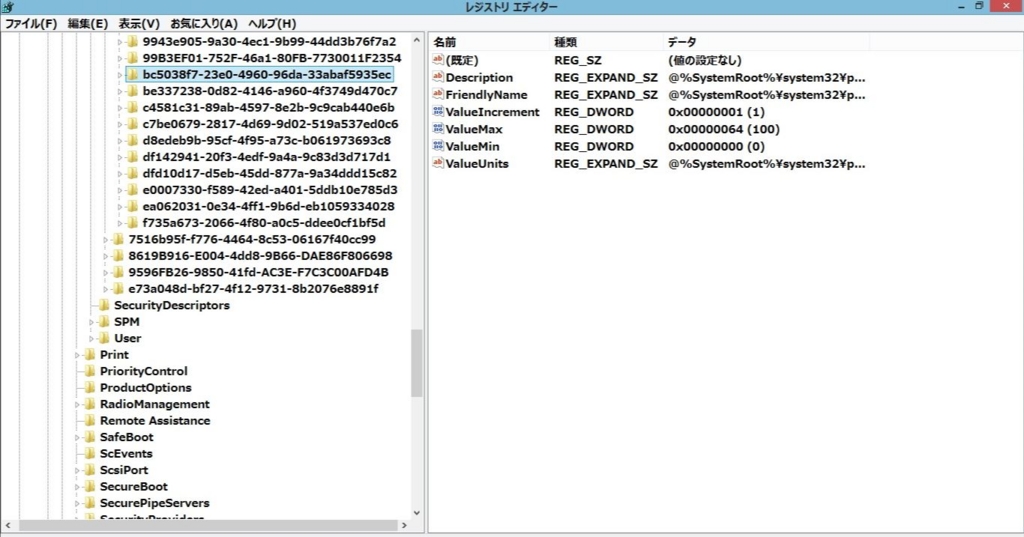
⑨ 「bc5038f7-23e0-4960-96da-33abaf5935ec」を選択すると、以下のパラメーターが表示されます。
(⑨ When "bc5038f7-23e0-4960-96da-33abaf5935ec" is chosen, the following parameter is indicated.)
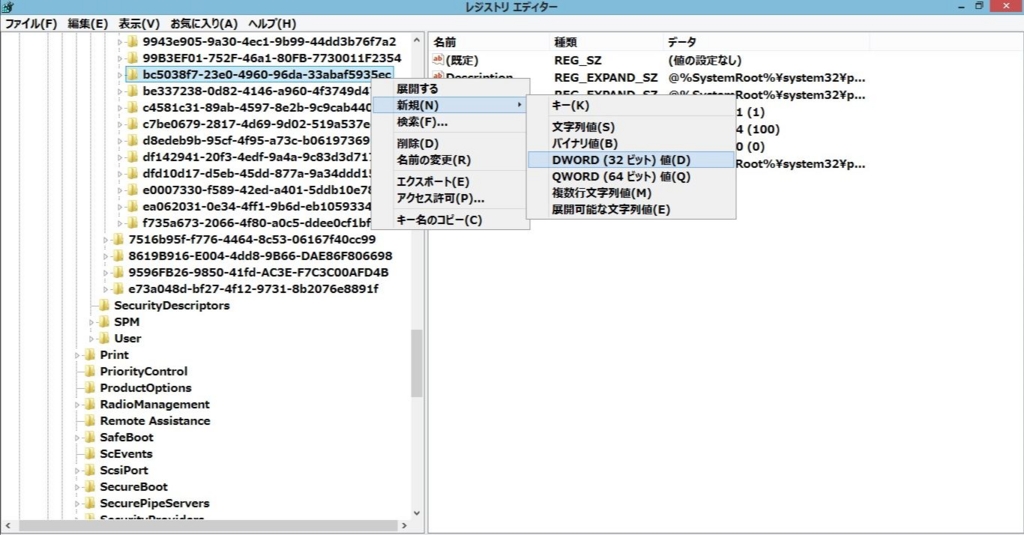
⑩ 右クリックで新規作成→「DWORD(32ビット)値」を選択します。
(⑩ Creation-> "DWORD (32 bits) value" is chosen by a right click.)
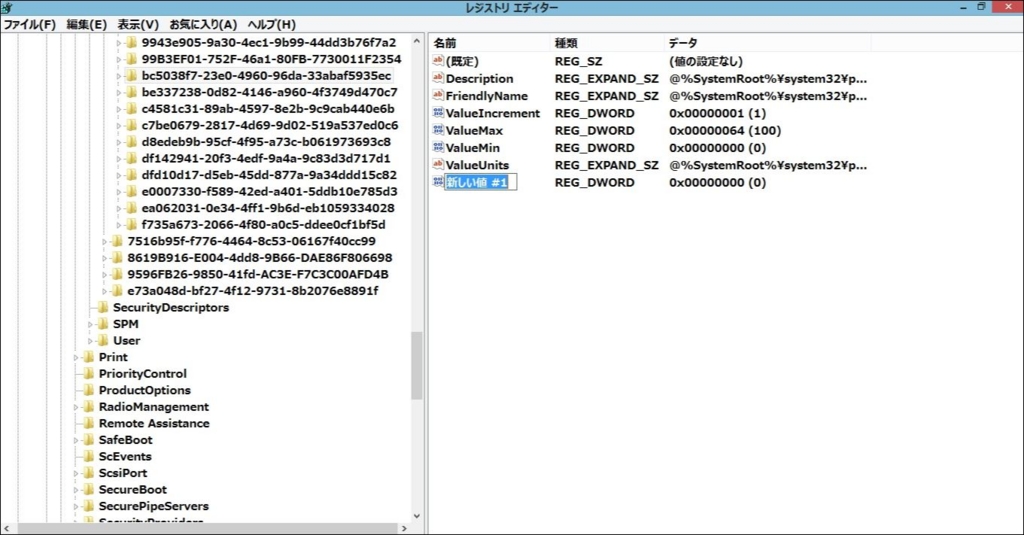
⑪ 「新しい値 #1」を「Attributes」に変更し、その項目をダブルクリックします。
(⑪ "The new value #1" is changed to "Attributes" and its item is double-clicked.)
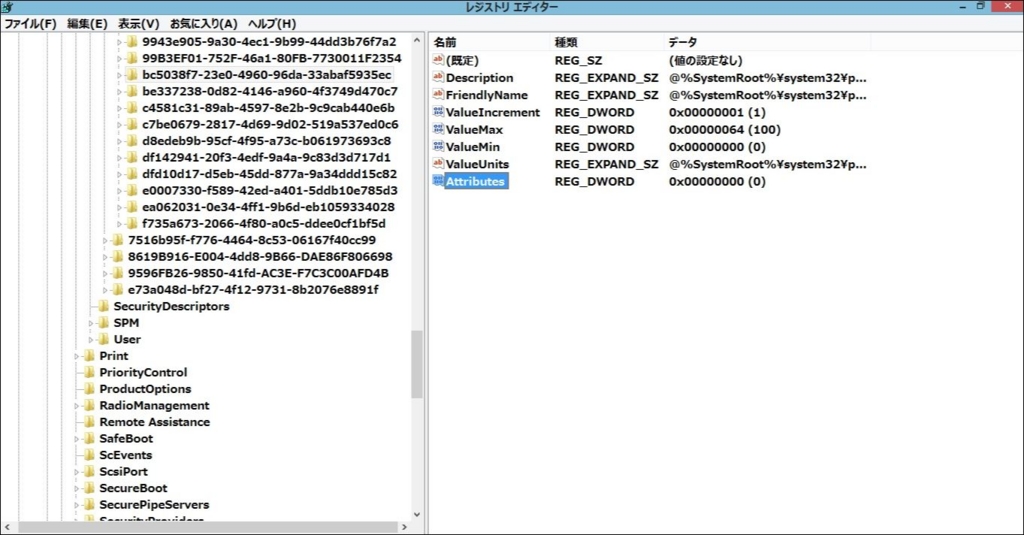
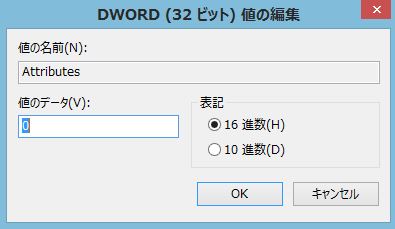
⑫ 「値のデータ」を0から2に変更し、OKをクリックします。
(⑫ "Data of the value" is changed to 2 from 0 and OK is clicked.)
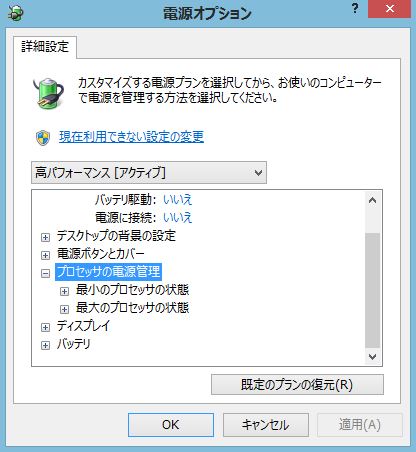
⑬ これで「詳細な電源設定の変更」で開いた画面に、「最大のプロセッサの状態」が表示されるようになります。
(⑬ "The state of the biggest processor" starts to be shown to the screen which was this and opened by "change in the in-depth power supply setting".)
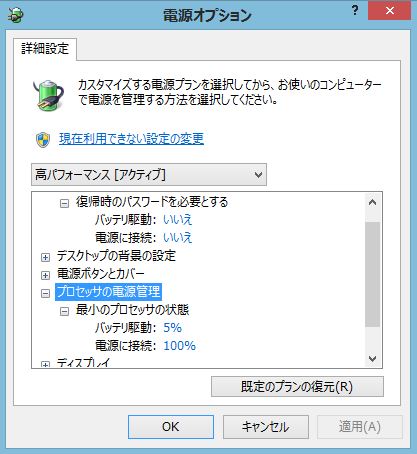
⑭ あとは、その項目の数値を好みで変更してください。
(⑭ Please change the numerical value of its item to the back by a taste.)
その他の項目も、値を0から2に変更することで、項目が表示されるようになります。
(Other items are also to change the value to 2 from 0, and the item starts to be indicated.)
これを知っていると自分のパソコンを細かく設定できますので、よろしかったらお試しください。
(The PC which is itself when I know this, small , It can be established, so if it's good, please try.)